Saturday, November 20, 2010

Diapering Excitement

Is it wrong to get super excited about diapers? I don't think so. Especially when the excitement means I get to continue being eco-friendly, but potentially have to deal with less mess! We have been using gDiapers since Baby Bunny was born. Well, technically, since she was about a month old and could actually fit into them since  she was less than 6 lbs when she was born and the small Little gPants go from 8 - 14 lbs. (They didn't have the tinyG's until she was about 4 months old.) While I/we love the look of them, and the fact that they are incredibly eco-friendly, and that she does NOT get diaper rash with them, and does NOT need diaper cream with them, they present a bit of a problem when it comes to poops. The poopy mess easily gets on the "waterproof" liner inside of the fabric shell. Especially since the soaker insert shifts around and bunches between her legs. I know we aren't the only family that has had a problem with this, as I've read other gDiaper users complaints about this problem.
Cute little gBooty
 I recently went on the Snikiddy website to buy some of their snacks directly from them. This led me to Alice.com (Which, by the way, was a great experience! I highly recommend that site!). Alice.com requires you buy 6 things to have free shipping. It doesn't matter how big they are, or what price they are - there just has to be 6 of them. So I decided to look for the gDiaper soakers (what they call inserts) since we needed more anyway. They didn't have any. But something called GroVia popped up. They had biodegradable soakers. hmmm. I decided to look them up!
The package of soakers - half of them are out and put away at this point.
 The soakers looked like they would fit in the g's we use from the little cartoon of seeing one in one of the GroVia diapers. Since the 50 pack of the GroVia soakers was only $19.99, versus the 30 pack of gDiapers soakers for $15 at Babies R Us, I decided it was worth a shot.
This is how they come  out of the package. They are tri-folded, and don't seem like they are big enough.

GroVia soaker unfolded. Definitely big enough! - Sorry for the bad pic it was taken with my phone.
See the tab looking things? Under those is where the stickyness is.
The soaker has a two-layer elasticized side part that's very similar to a disposable diaper. This by itself made me VERY excited. Hopefully this would mean no more poopies escaping from the side of the soaker and getting on the liner. The back of the soaker at either end in the middle has about a 2" square of stickyness. This made me even more excited. Hopefully this would mean the soaker won't shift about! Especially with a baby that's super active like mine.
All the pieces together - medium gPant, gliner, and GroVia soaker. Ready to wear!!

Last night I used one of the new GroVia soakers and it seemed to work out just fine...but I think I waited too  long to change her this morning. She was fine when we got up, but after I went to the bathroom, she had soaked through the soaker, the "waterproof" liner in the g, and the two layers of cloth outside. Granted not very much came all the way through, but it was enough that when I picked her up I noticed that her butt had some dampness to it and it shouldn't have.
Changed her diaper to a fresh gPant and fresh (GroVia) soaker. About an hour later there was a nice poopy present. And guess what! It was contained within the elasticized sides!! There was NO poopyness on the "waterproof" liner!! YAY! SO happy about this! Then again a couple hours later, a peed in one - again, no mess! YAY! Even more excited!!
So, is it wrong that I'm this excited about a diaper? I think not. Especially when it can biodegrade, flush, compost, or just be disposed of. If I have another child in the future (or maybe I should say when?! ;) ) I just might have to buy a GroVia all-in-two diaper or two to see how theirs compare to my beloved g's. Or maybe GroVia should send me one to compare. ;) A mom can wish, right?

Friday, November 19, 2010

Wonderland Painting

So...after a friend saw my other paintings, she made a request. She wanted a Tim Burton style Alice in Wonderland painting. My response in my head was ".....................You want what?!.............You think I can do this!?............I don't know about this one......" What I said to her was "UM...I can try. I don't know how it will turn out. I've never done one like this before. This will only be my 5th painting EVER. Are you sure you want me to do this?!" Her response was along the lines of "Absolutely! I believe in your ability."
I used four 12x12 canvases and arranged them so they were off kilter.
View from the side. Yes, I DO like to paint the sides of the canvas too.

The whole thing all together. See what I mean about putting them off kilter?

This is my favorite guy - The hooka smoking caterpillar. I LOVE the way he turned out. He looks way better in person. See the crown? A nod to the Queen of Hearts.

Both my most, and least favorite mushrooms are here.

Close up of the Cheshire Cat. I know I could have done better....But he was literally the first thing I painted on the canvas after the base of light blue/white, so I forgive myself.

A close-up of the White Rabbit. He also looks better in person. His fur looks soft and real in person. I'm very pleased with how he turned out - he's my 2nd favorite in the painting.
So... That was my first attempt at a complicated request that included animals. Overall I'm very pleased. There are some things that I would change if I were to do it again. And this took a LONG time to make. But, like I said...5th painting ever. Now on to the next project!

Wednesday, November 17, 2010

Paintings, and Jewelry Oh MY!

I adore creating things. If I didn't have my heart set on being a nurse practitioner I'd make creativity my full-time job. Sewing clothing for myself and my children, and other people's children, making baby stuff like carriers, bibs, burp cloths, painting, making necklaces, earrings, bracelets, anklets, crocheting blankets, and clothing, cross stitching, and I'm sure there's more but I can't think of it at the moment. I love being creative as a means of relaxation. And to give things to others that I've made makes me feel better than giving something bought. I'm not positive the other people always like what I make/give... but I enjoy making things with them in mind.

A close-up of a bracelet I made.

Everything I do is basically self-taught. I've looked at what other people have done, and then done my best to figure out how it came about. I would absolutely love to take classes of all kinds. Classes on jewelry making, all different kinds of painting/drawing techniques and forms. Sculpting! That would be a blast!! I've only made a few paintings so far, but I'm definitely enjoying it. As of now I've done 2 tree paintings, and I'm currently working on a third. I've also done one for my middle daughter that's berries and birds,  and another for my youngest that's snails and mushrooms and flowers.


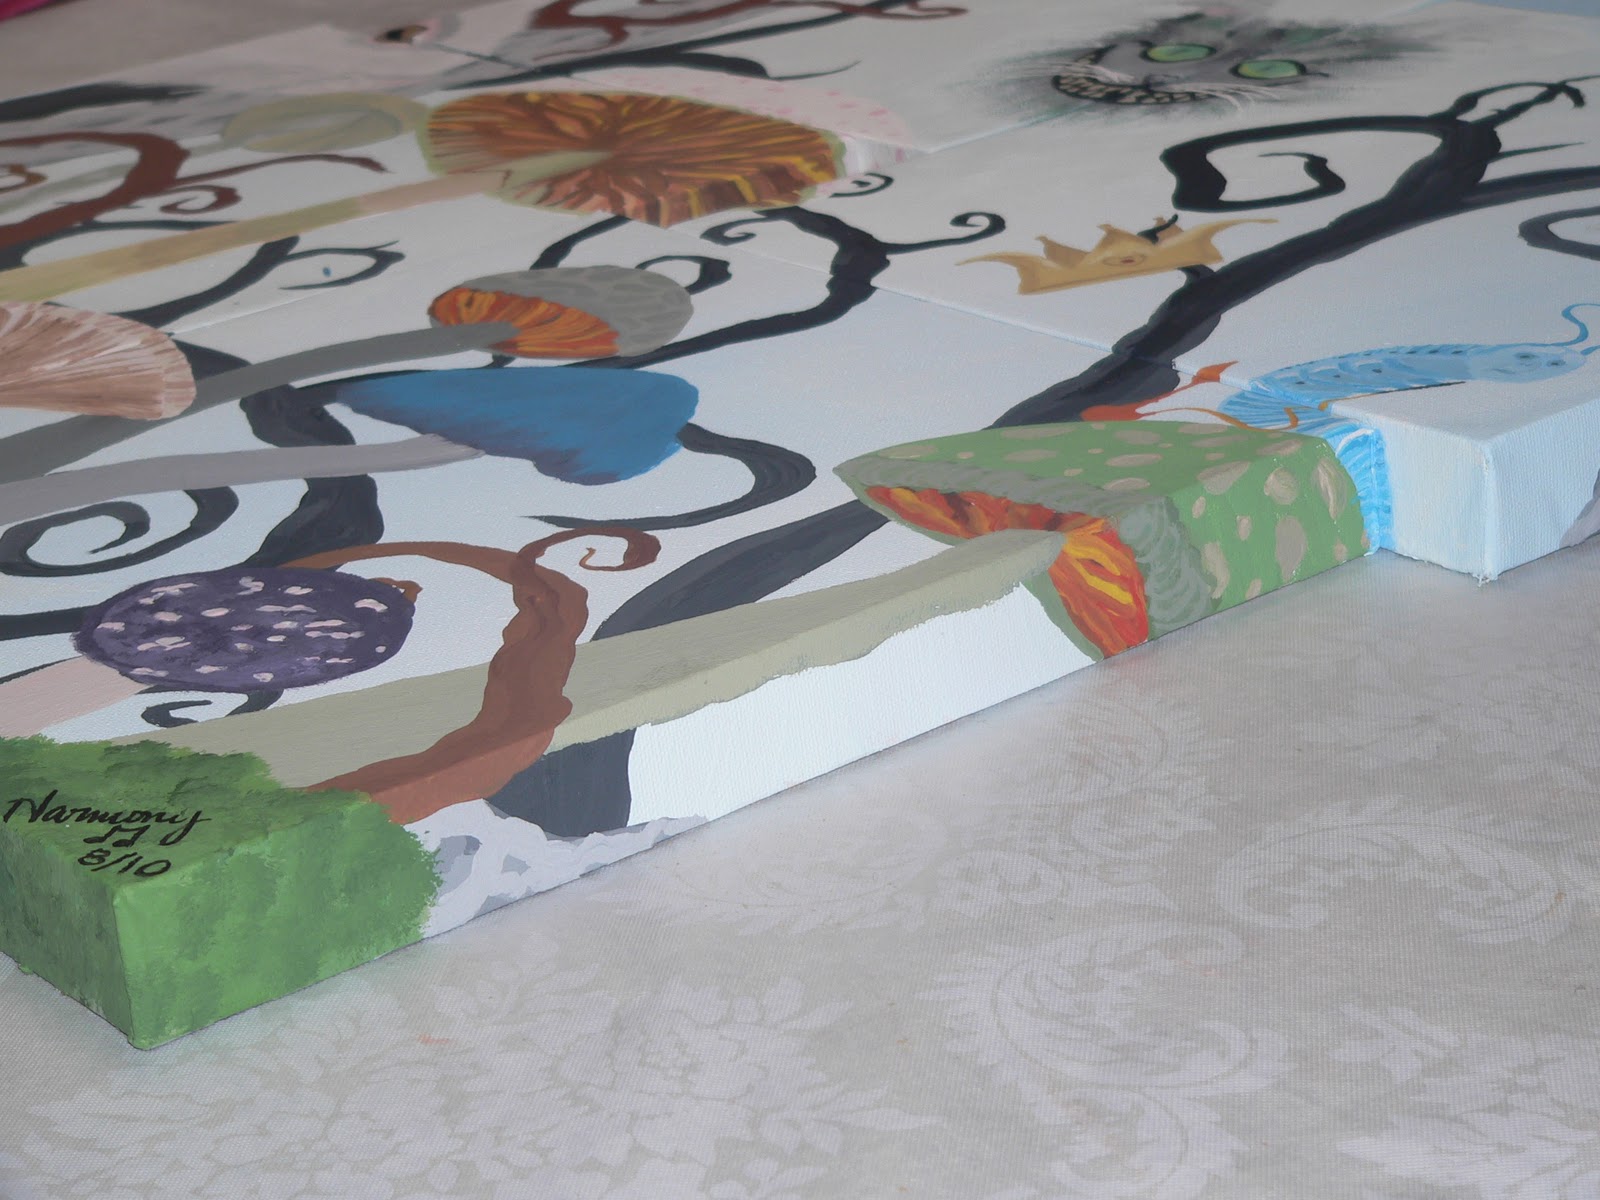
This is a picture that I painted for my middle girl of our family. Obviously it isn't exactly our family - it's a family of birds. But we are all in there, plus one (for a future child we'll either have biologically or adopt). Below is our family for my youngest girl ... but it's snails. Again with a plus one for the future.

I just realized how HUGE my chest looks in this picture. YIKES!
I also painted a t-shirt last night/today. That turned out pretty fun!
 The completed painting(s) I  was working on earlier of a cherry blossom tree. :) I made it for my best friend/sister. And I'm so glad she loves it! :-D I really enjoy the fact that it's broken up. I think it makes it more interesting that way.
The painting in total with all of it's parts together.


The painting as a close-up of the bottom.

Tuesday, November 16, 2010

Prioritizing

I'm freaking out a little bit. Not only is Christmas just around the corner, but I know a bunch of ladies having babies right around the same time, too! Oh, and add to that some things that I need to get done that I've been promising I'd get done for a while. Then let's not forget that I'm still in school until Dec. 7th (I think), and I'm still working part time, and my girls have all kinds of appointments they have to go to (Baby Bunny has her 9 month dr. appointment next week - nuts hard to believe she's already 9 months on the 19th!!). Add in more general holiday/family craziness and I don't have much time to tackle my growing list of things to make.
My sewing priority list:
Actual names are omitted so people don't necessarily know what they are getting if they happen to look here! Oh, and notice the ones with the huge arrows and little stars and things written off to the side? Yeah... those are ones I forgot about when making the list originally. OOPS!

My painting priority list:
Names are omitted for the same reason as the above list.

And these keep getting added to. YIKES! Do you make priority lists? Do yours seem to grow? Mine needs to stop growing! I need to start checking things off!!! Oh crap! I just thought of another to add. AAACK! (Think of Cathy from the comic strips.)

Monday, November 15, 2010

Upcycle, Reduce, Reuse

My latest love? Upcycling. What is upcycling?! It's taking something that you would throw away, or deem "garbage" or "unusable" or even just "ugly" and turning it into something else. My favorite things to upcycle right now is sheets and (fabric) shower curtains. Not only is it reusing something that already exists, but I'm turning it into something that either I, or someone else, needs and/or wants.
I made a baby carrier for myself that I could/can/will use from the time my baby was born, through toddlerhood. I made this carrier out of a gray sheet and a green shower curtain. Both of which I bought at Goodwill since I did not have a spare shower curtain or sheet to make it with.

The gray side with a green pocket
The green side with a pocket.
I added batting to the top part of the carrier and then quilted on it to keep the batting in place. You can see the quilting on the gray side. I also made a button-hole in the sides to adjust the length of the straps.

I've also made clothing using sheets, ribbon I've had around forever, and some new fabric to mix in.
Close-up of the giraffe I appliqued
Can you tell which fabric is the sheet and which one is the bought fabric? If you can't tell, I'm not going to!
I've also made items for caring for your baby - baby towels, burp cloths, bibs... Is there an end to what I can/will make? I'm not sure. If so I haven't hit it yet!! I'm definitely loving this form of recycling. It's not just something I put in a recycle bin, and wonder what ultimately happens with it. I'm making things into something else myself - so I know exactly what's happening with it!

Friday, November 12, 2010

Refashioning for Bunny Baby

I have many shirts that either don't fit me anymore, or have stains, or holes, or whatever. But I have a hard time parting with said shirts. Call me thrifty, call me a hoarder, whatever. I'd rather keep them and try to do something with them, or give them away to someone who can use them, than just toss them in the garbage. (I almost never throw old clothes away. If I can't find someone that can use them I donate them.)
Sooooo into the story comes a nice orange tank top with a pretty lace bottom. The tank top part is in great shape, but the lace is kinda starting to wear out. The rubber elastic threads are starting to pop out, and the lace is starting to get holes (probably all thanks to my jeans....oh well.). And as much as I love the shirt, and the color, it never really stayed down how it was supposed to. Likely because I'm tall. I can't change my height, even if I sometimes wish I could.
Back to the shirt, and remaking it into something for Bunny Baby...
So, I took my shirt, and laid out one of her onsies on top for sizing. I cut it out in a ragline style, then cut out sleeves too. Then I took some coordinating fabrics and cut out wide, short strips of fabric (in walks a flat sheet from the thrift store, a fitted sheet from the thrift store, two fat quarters, some free fabric (the best kind!!) and some fabric I got on super sale - 75% off of the clearance price! YAY!). Sew strips of fabric together, add some pretty ribbon from the dollar store, sew on another chunk of fabric to the bottom (an edge of the flat sheet) for a nice contrasting bottom, then it's ready to gather at the top! Sew together all the pieces for the top part, then sew down under the arms and down the body. Then attach the gathered skirt part to the knit top part, and it's 97% done! Hem up sleeves, and neckline... then voila! Cute dress!!


Can YOU tell which fabric was the sheet in the vertical pieces?! Take a wild guess!
Sorry I didn't take pictures of the process. I'll do it some other time with better instructions.
The second dress was made from a store-bought 12m Garanimals shirt, a piece of fat quarter (ok, MOST of the fat quarter...), a 50 cent bandanna from the dollar store, and some other super sale fabric. Undo the bottom of the shirt's hem, cut off about an inch and a half up from the bottom (just straight across!), and then again another inch and a half above that - set aside. Sew together the strips of fabric to make tubes (all the same length, but different widths), hem up the bottoms, gather up the tops. Sandwhich the one that's the smallest width between the shirt piece and one of the cut off bottom of the shirt pieces, and sew together. Do again with the middle width ruffle, the now bottom of the shirt piece, and the remaining cut off piece. Finally, attach the widest ruffle to the now bottom of the DRESS (since it's no longer a shirt) piece. Add some embellishment (in this case some scrap ribbon, and some dollar store ribbon made into a pretty bow). Put on your baby and enjoy!

Do you know which one was the dollar store bandanna?? Guess! I dare you!Sorry I didn't take pictures of the process for this one, either. I really will write a better (REAL) tutorial some time, I swear!!

Wednesday, November 10, 2010

Hardboard Nursery Art

I was inspired by Lil Blue Boo to make a piece of nursery art for my soon-to-be-here grand-nephew. Great-nephew? hmmm Not sure which one it is. Either way it makes me feel old. I can hardly believe my little baby niece is old enough to be married and having a child. Crazy how quickly time flies!!
Anyway, I've gotten off topic. Here and here are examples of Lil Blue Boo's nursery art. I don't think mine turned out as fantastical as hers do...but then again this is the first one I've done!
It really wasn't terribly difficult. And I don't think it takes a HUGE amount of skill (Can you hold a paintbrush? Use painters tape? How about cut ribbon? Know how to squirt out glue? Then you can do it too!! ;-) )
The supplies I used to destroy construct my piece of art:
paint, paint brushes, painter's tape, ribbon, letters printed from the printer, little wooden letters, glue, and paint pens
Base look of canvas was done using brown, green, and tan paint squirted on randomly and then blotched sort of together. Let mostly dry, then add a little more of whatever color you think it's lacking (in my case, "pure" green, and "pure" brown), and blotch all over. Then let the second layer mostly dry, and do the same process one more time. Next put painters tape down in a random way to tape off areas you don't want to get painted. Then paint the areas you do want to get painted.
blue painters tape, wet brown, green, and tan paint
Remove the painters tape when the newly painted areas are at least 95% dry. Add embellishments as you like. At this point I used a medium tipped silver paint pen to add dashed lines and dots, glued on ribbon, then painted on a leaf-less tree.
The start of a first sergeants patch being painted on.
Add more embellishments while the paint dries. I used clip art in Word for the tank, and found the owl online, then printed them in color. Then I used the medium tipped silver paint pen to write in some words.
 
I finished off the sergeants patch using a medium tipped black paint pen, wrote in a few more words with the silver paint pen and then worked on the name. For the name I traced around the letters I printed off the computer with a pencil, as well as wooden letters I bought for pretty cheap at Wal-mart. Then I painted the letters in with a fine tipped black paint pen, then traced around that with the medium tipped silver paint pen. After all that was dry I painted in the larger letters with blue paint so they would stand out. What you can't see is that off to the side I was painting the wooden letters the same green that I used in the blotching process, and for the one stripe.
I attached the painted wooden letters with some glue, added in some more words with the black fine tipped paint pen, and touched up all of the black outlines of the blue letters. Once that was dry I added in some silver dots in a sort of patterned fashion. If I had brads, I might have added those to all of the major points of the letters as if they were being held up by them. Also added in: a black painted in "picture corner" in the lower right hand corner. Why? Because I accidentally got black paint on my hand, and then smudged it on the picture. Oops!! Oh well... I think it looks cute.

A close-up of the letters. It's kinda hard to tell, but the E is up off of the canvas.
A close-up of the owl in the tree and the striped area.


 So... There you have it! My first attempt at a personalized hardboard nursery art piece. I hope my niece and her husband like it! Her husband will probably like it since there's military stuff on there. ;)

Monday, November 8, 2010

Inspiration

It's amazing how inspiration can sometimes come from the most unlikely of places.
SSOOO I have a shirt (or 2) that's completely plain. No designs of any kinds - save and except for the accidental bleach spots. I don't want to throw said shirt(s) away because I like 'em. I got the idea, just now, on the way to work, to do a bleached out design of some kind on them. Like...use bleach to make a picture of a tree, or bird, or what-have-you, and then add in some splatters here and there, quickly wash it off (so it doesn't make HOLES in my shirt(s)), and then have a newly redesigned shirt. Has anyone else thought of this? Have you tried it? If so, what were the results?
I'm not entirely sure what made me think this would be a good solution...but it seems like it might be an interesting experiment, at the least!
Then there's the inspiration that others give. I'm constantly being inspired by other people. Things they say, do, show, blog about, what they are inspired by, etc.
Here's a for instance.... Lil Blue Boo has done a couple of quick tutorials on how to make personalized nursery art here and here. This has inspired me to make a one of a kind personalized piece of nursery art for my niece and her husband. I hope she (and he, and baby boy) like it. I'm not done with it yet, but as soon as I am I will post tons of pictures of the process!!
I also get tons of inspiration from things around me - fabric, decorations, plates, toys, random objects, nature....I could easily keep listing.
What kinds of things inspire your creativity? Your every day life? Think about those things now and then, and try to come up with new ones. When you TRY to come up with something to inspire you, you sometimes hit the jackpot with an idea. :-)