
Friday, October 8, 2010

Meatloaf Yummy Goodness

Personally, I don't *love* the typical meatloaf. Thankfully, this isn't your typical dry and boring meatloaf recipe!!

Ingredients:
~3 lbs of ground beef of your choice
~1 lb of ground turkey of your choice
~2 eggs
~1 tsp (ish) of Worcestershire sauce
~1 c (ish) of your favorite bread crumbs
~1 can stewed tomatoes
~Parsley - how much I add depends on if I have fresh, or if I'm using dried.
~Mashed potatoes - approximately 4 - 6 cups


*OPTIONAL*
~Other spices such as steak seasoning, or oregano, or tarragon, or whatever else you think smells good.
~In this version of my standard meatloaf I added all the typical ingredients, but I also added a shredded sweet pepper. Why shredded, you ask?! Because if it was NOT shredded (into itty bitty nothingness, I might add) My husband and daughter would have whined and complained that there was a pepper in the meatloaf. Since it was shredded up to nothingness and added it's yummy good flavor without them knowing it - they were none the wiser and enjoyed it! ***Side note - this trick works in MANY dishes, and with MANY different "disliked" foods. I even do it with stuff I don't like (cauliflower) and when it's all mixed/cooked into whatever the food is you typically don't notice. A great way to eat more veggies without forcing the veggies down!
~Garlic in whatever form you like. I prefer pressed or shredded cloves over powdered or garlic salt. Personal opinion - it just tastes better! For this much meat I'd use probably 4-5 cloves.

Instructions:
Turn oven on to 375 degrees.
In a large casserole dish put the meat (both kinds), eggs, worcestershire sauce, bread crumbs, stewed tomatoes, parsley, and whatever optional ingredients you would like to add.
Take off any/all rings (and likely bracelets too) - cleaning meat out of your jewelry is NOT fun, but it's even less fun to have meat rotting inside your jewelry because you couldn't get it all out. Mix all the ingredients together with your hands. It's kinda nice to squish it all together -  great way to get frustration out!
In a separate bowl make/mix mashed potatoes (I prefer using the instant kind, but however you prefer them, use that kind!).
Make sure meatloaf is completely mixed together, and the bread crumbs, seasonings, and whatever veggies you've added (including the stewed tomatoes) are nice and squished up and evenly distributed throughout. Pat the top to be fairly even and smooth.
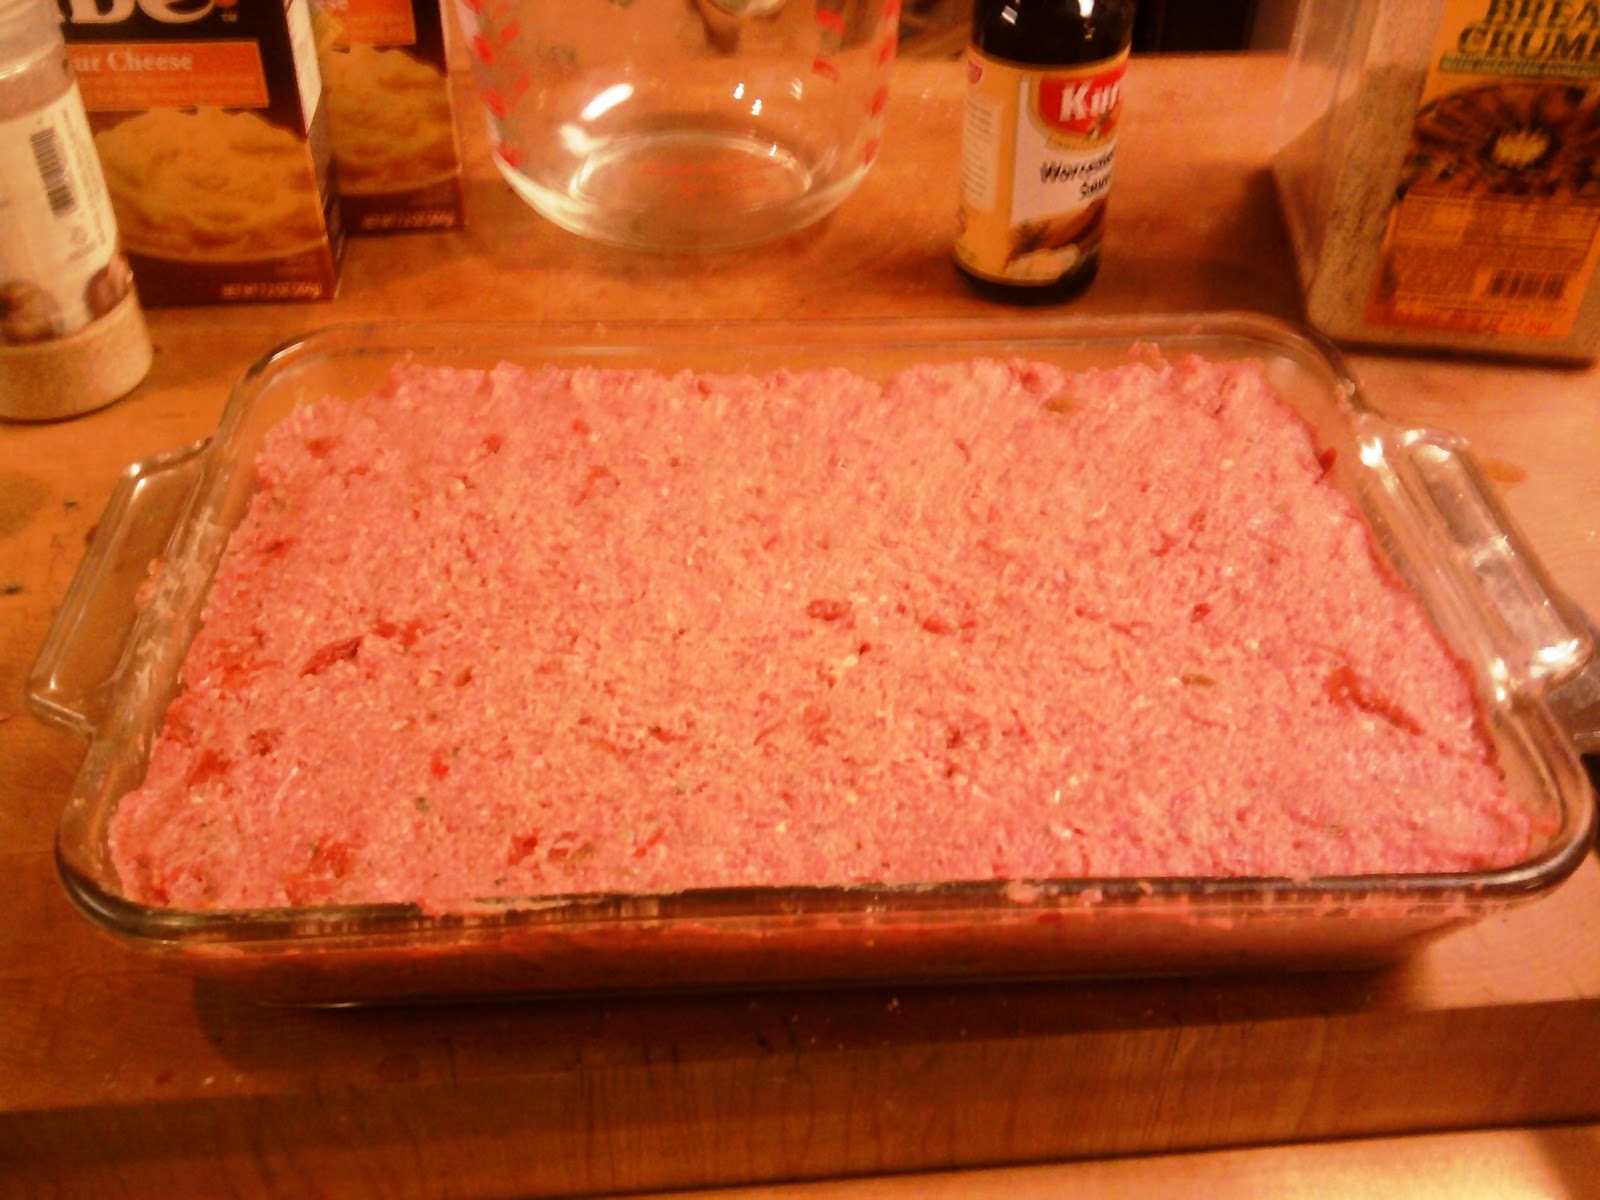
Wash your hands - they'll be full of meatyness at this point.
Evenly spread the mashed potatoes on top of the meatloaf. Trust me, you want the stuff to be all sitting in the large casserole dish fairly evenly. Otherwise you'll end up with meat spots less/more cooked than others, and the potatoes might burn in places....it's just best to have it even!
Place in oven and bake for 30 minutes. Rotate. Bake for another 30 minutes. The potatoes will take on a sort of crust around the edges, and the meatloaf juices will be bubbling up the sides.
Take out, let it cool down for a few minutes (long enough to get out plates and forks and heat up a side veggie like corn or whatever else you want to eat!), cut up, serve, and eat! You will NOT need ketchup on it. As a matter of fact, you'll probably thoroughly enjoy how it tastes without ketchup on it.

mmmmmmmmm Good stuff!
P.S. Leftovers are JUST as good as the original night. YUM!
Please excuse my blurry pictures I took using my cell phone. :)

Wednesday, October 6, 2010

Mashed Potato Corn Chowder

Soooo... Last night we had beef au jus sandwiches for dinner with a side of corn and mashed potatoes. Ended up making far too much mashed potatoes, and I thought it would be great to turn it into potato chowder. So today I searched for recipes. I found a couple that sounded alright and kinda put bits of this together with bits of that to come up with some seriously delicious chowder!
 Left over mashed potato and corn chowder:
2 cans of chicken broth
1 can of creamed corn
1 can of whole kernel corn (drained)
2 cans of diced white potatoes (drained)
3-4 cups of left over mashed potatoes
7 slices of bacon
4-5 cloves grated garlic (to taste)
dried parsley flakes (to taste)
salt (to taste)
paprika (to taste)
dried basil (to taste)
celery seasoning (not celery salt) (to taste)
milk
water
butter

In a large pot put in the two cans of chicken broth and start heating up. Spoon in left over mashed potatoes. Thoroughly mix together with chicken broth. Add milk, water, and butter to make a full, smooth consistency. Add in cans of corn, creamed corn, and diced white potatoes and stir. Cut slices of bacon into mixture. Grate cloves of garlic into mixture. Add about 3 tablespoons of parsley, a 1/2 teaspoon of salt, 1 teaspoon of paprika, 1/2 teaspoon of celery seasoning, and 2 teaspoons of basil. Stir and taste. All measurements are guestimates since I just sprinkled a bunch in until it looked yummy, then stirred and taste tested and added what seemed good until it tasted right.
It should look something like this:

Mashed Potato Corn Chowder

And it should taste ohhhhh sooooo yummy!!! Enjoy it! :-D
This much should feed about 8 people give or take ... The leftovers we have are in the freezer waiting for us to enjoy them another day! :)

Monday, October 4, 2010

Ruffled Pinafore Dress

Sooooo one of my best friends has gotten me hooked on reading/writing blogs (hence, this blog was started!) All of the blogs I read are craft/sewing/painting/cooking related, aside from friends. On this blog I found an ADORABLE pinafore dress that I just HAD to recreate. Yes, it was mandatory. Absolutely. I mean, I have a cute baby girl that needs a cute ruffly dress, right?!
Well, I  didn't buy the pattern (SORRY Little Lizard King!!) because the pattern was fairly easy to figure out from looking at the pictures. Or at least, a close approximation. So what does my first pinafore dress look like you ask!? Like this!!

It's all wrinkley because Bunny Baby had worn it all day. I made it using two different pillow cases bought at Salvation Army and a little left over seam binding. ...Total dress cost you ask!? Roughly $3.00. Maybe. I'm planning on making several more!! I just LOVE these! She can wear a long sleeved shirt (onsie) and leggings or bloomer underneath and it's good for year-round wear. PLUS as an added bonus, she can keep wearing it for a couple years. It'll just be a fabulously adorable shirt later! HAHA! LOVE!!!
Of course, this posting wouldn't be complete without putting up a picture or two of my Bunny Baby wearing her new frock.
Bunny Baby with her big sis Puppy Girl right behind her. <3
P.S. The dress is even cuter in person. I really need to start taking pictures with a better camera.

Saturday, October 2, 2010

Headbands Headbands Everywhere!!

My latest favorite thing to make?! Headbands!!! Started off wanting to make headbands for my (nearly) bald Bunny Baby, but it's turned into a sickness, I think.
First came this one....

...I used some scrap soft lycra in a wonderful (pepto bismol) pink, and serged bright orange around the edges, and added an applique that was all too plain - so I added lots of pretty orange sequins to it! And believe me when I say I very much plan to make many more in other color combinations!! FUN!
Then I saw a super cute headband in (on??) this Etsy store and knew that I could recreate it myself, and add my own fun touches.... so next came this one...

I know the pictures are blurry - I'm sorry for that. Bunny Baby does NOT stay still for very long when she's awake (AKA: Not. At. All.). I'll try to take a better picture one of these days - but who knows if it will actually happen! Thanks to some dollar store headbands and felt and some beads I already had she has another new headband! Even better?! Puppy Girl and I can wear it too! Thank you stretchy headband making people!
Then the other day I was putting on my new orange shirt that came with a super cute belt and decided I needed some sort of accessory that would help hide my greasy hair (being a super busy mom that goes to school and works means my hair isn't always washed as often as it maybe should be... eh. Not the worst thing in the world!) So I whipped up another new headband!

It literally took about 5 minutes - much less time than it would have taken to jump in the shower right then! Again - thanks to a pack of dollar store headbands and felt and some beads I already had - PLUS an orange permanent marker to color the edges of each layer.... aaaahhhh CUTENESS! And once again, Puppy Girl and Bunny Baby can wear it too!
And that brings us to today. My niece LuLu Bunny was wearing her strawberry dress...and Bunny Baby was wearing her strawberry onsie with a skirt...and neither of them had a cute HEADBAND that would go perfectly!! *GASP!* I guess that meant I had to take it upon myself to make some kind of adorable accessory to go with each of their outfiits! DARN! (Feeding my own newly acquired headband sickness.)
Soooo.... Here's the strawberry cuteness for you to marvel at...


Aren't they just ADORABLE!? Could almost eat them all up!! And once again, dollar store package of headbands, and felt! YAY!
I'll be posting a tutorial sometime in the future. But I don't have time at the moment... so just enjoy the cuteness!

Wednesday, September 29, 2010

Who I/We Are

I'm Harmony and I am many things... a wife, mother, daughter, sister, friend, student, and crafter of all sorts. My wonderful husband, Hubby Babe, is a corrections officer; keeping the rest of us safe by putting up with prisoners and all that they entail. His oldest daughter (my step-daughter), Big Monkey, lives up north near her mom. Our middle daughter, Puppy-girl, is in 4th grade now...and it's crazy to think she's only another year away from going to middle school. How does time go this fast!? Our baby, Bunny-babe, is now 7 months old and is crawling every where and we've started potty training. And then there's me. I'm nearly done with my AA (I'll be graduating May 2011), and hopefully starting nursing school next August to get my RN, and BSN. I'm also addicted to crafting, sewing, painting, and creating of all kinds. I don't know how I find the time to do as much as I do...Some days it doesn't seem like there are enough days in the week. OK, most days it doesn't!

Monday, September 27, 2010

Homemade Lasagna Roll-ups

About a week ago (ish) I was watching the Today Show in the morning and one of the guests was making lasagna roll ups. I thought this sounded like a fun way to eat lasagna, and I've never made lasagna before...but it looked so easy! So I figured I'd look it up and get the ingredients and make it when I had the chance. I looked it up earlier this week, then bought the ingredients we didn't already have a few days ago. And today/tonight Mary and I worked together to make it! I adjusted the ingredients slightly, and doubled the recipe since we have a lot of people to feed. The prep time was approximately 30 minutes.
Ingredients:
1 extremely large carrot*
1 very small head of broccoli*
6 oz thinly sliced prosciutto**
1 (15-ounce) container whole milk ricotta cheese
1 (15-ounce) container skim milk ricotta cheese***
2 1/2 cups grated parmesan
4 cups grated mozzarella
4-5 cloves garlic
2 eggs, beaten to blend
2 lbs uncooked lasagna noodles
2 cans of spaghetti sauce
2 cans of alfredo sauce

Directions:

Cook lasagna noodles according to box directions. (Cook only one box worth at a time though!)
Into large mixing bowl put: Peeled and shredded carrot, finely chopped up broccoli, and shred some of the stem portion. Add both containers of ricotta cheese, 1 1/2 cups of mozzarella, and 1 cup parmesan. Chop up the thinly sliced prosciutto into tiny pieces and add to mixing bowl. Grate the garlic and add to mix. In a separate container beat the two eggs together until blended (we used one of the now empty ricotta containers to save on dishes) then add to mixing bowl. Take off whatever rings/bracelets you don't want to get dirty and mix with your hands (works WAY better than using a fork or whisk, or hand blender).
Mixture blended together should look similar to this
Now preheat the oven to 450 degrees F. Put a 13x9 baking dish near your work area.Pour enough of the tomato based sauce to have a thick coat on the bottom of the dish. Lay out 4 lasagna noodles on a work surface, then spread about 3 tablespoons of ricotta mixture evenly over each noodle.
Starting at 1 end, roll each noodle like a jelly roll. Lay the lasagna rolls seam side down, without touching, atop the spaghetti sauce in the dish. Repeat with the remaining noodles and ricotta mixture.
Pour the rest of the spaghetti sauce over the lasagna rolls. Sprinkle 1 cup mozzarella and 1/4 cup of Parmesan over the lasagna rolls.
Cover tightly with foil.Repeat in a second baking dish for the alfredo sauce.
Bake until heated through and the sauce bubbles, about 20 minutes. Uncover and bake until the cheese on top becomes golden, about 15 minutes longer. Let stand for 10 minutes.


And EAT! MMMMMMMMMmmmmmmmm Such a wonderful dinner. :-D
*I substituted a large carrot and very small head of broccoli for the spinach the recipe called for.
**I used 6 oz of thinly sliced prosciutto ... but you really couldn't taste it. I'm thinking it might have been tasted better if I had cut it into pieces just the right size to cover (or nearly cover) the spread out mixture on the noodle before rolling. I'm going to try that next time.
***The original recipe only called for whole milk ricotta ... but I decided to mix whole milk and skim milk. It tasted great. :)